Luna G3 Auto CPAP- Setup and Review
Hey, it's Bo. Today, Let's discuss the latest Luna G3 from 3B Medical. This CPAP machine replaces the Luna 2, a great device with some drawbacks. The Luna G3 addresses these issues and offers size, noise level, and overall functionality improvements. In this video, we'll cover the features of the Luna G3 and highlight what
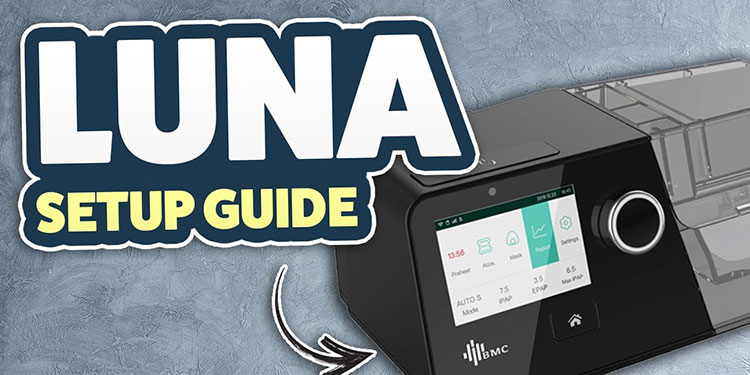
Hey, it’s Bo. Today, Let’s discuss the latest Luna G3 from 3B Medical. This CPAP machine replaces the Luna 2, a great device with some drawbacks. The Luna G3 addresses these issues and offers size, noise level, and overall functionality improvements. In this video, we’ll cover the features of the Luna G3 and highlight what sets it apart from its predecessor.
Next, we’ll dive into the patient menu so you can learn how to adjust the settings on the Luna G3. We’ll demonstrate the unit with a mask on so you can hear what it sounds like while breathing. I’ll give you an honest rundown of the features and benefits of the Luna G3, comparing it to other units and explaining why you might like or dislike it compared to other options. If you appreciate the video, please don’t hesitate to share it with others.

We appreciate your support, so don’t hesitate to give a thumbs up and subscribe for more information. Additionally, if you have any questions, comments, or experiences, please leave them in the comments section. I do my best to answer any questions and will do the necessary research to provide you with answers. Now, let’s discuss the differences between the Luna G3 and the old Luna 2. Firstly, the Luna G3 has a front-facing design, making it easier to navigate and view the unit while in bed. It’s also smaller and more compact than the Luna 2. These improvements make the Luna G3 a more user-friendly and efficient option.
The Luna G3 is compact, measuring only 4.5 inches by 10.5 inches, making it easy to fit on your nightstand. It also weighs only 3.5 pounds, making it easy to pack and take. The unit has a standard tubing connection on the back. It can work with any standard CPAP tubing, including their new heated tube, with a specific cord for plugging in. As long as your tubing has a 22-millimeter connection, it will work with the Luna G3. Another great feature is that it is easy to see and navigate, making it a user-friendly option.
The Luna 3 now has a built-in cell modem, eliminating the need for an external attachment. It automatically uploads data to the cloud for compliance reports and doctor follow-ups. An SD card is available, but not as necessary on this model. The humidifier setup is on the right side. It can fill while attached to the CPAP, making it a unique feature compared to other models.
The ability to fill the humidifier without removing it is convenient for many users. To remove the humidifier, press down until it clicks and pops loose. The heater plate and humidifier are dishwasher safe, making maintenance simple by placing them on the top rack of the dishwasher for cleaning and sterilization. To reattach it, press it in the same way it was removed.
The humidifier clicks to confirm it is securely locked in place. If it’s raised, it will leak air and cause apparent noise. Only use distilled water in the humidifier to prevent mineral buildup and the need for frequent cleaning. Dump out and refill with distilled water daily to avoid stagnant water, mold, mildew, and bacteria growth. The SD card is located inside the unit.
An 8GB SD card is inside the unit behind a rubber flap. Most doctors and suppliers use the built-in cell modem, a standard feature in current Luna machines. A manual download option is available, and a video shows how to perform manual downloads on Luna machines. The filter location is accessible by pressing down on the top of the vented cover in the back, revealing a washable filter.
The filter should be rinsed out once a week, dried, and reinserted. The G3 cord plugs into the top right corner of the back. At startup, the main screen will be lit with the preheat option. If you live in a colder climate and want to preheat, press the preheat button to start a timer.
The cord for the G3 humidifier can be plugged into the top right corner of the device. Once turned on, the device will start with a preheat function, which can be canceled by pressing the button again. On the main screen, you can also access information about the mask, filter, and tubing you’re using and reset them as needed. The device will also give you a usage report and allow you to upload the information to the app. The fit mask feature will enable you to test the mask seal and make necessary adjustments. The usage summary will provide an overview of your therapy progress.
Navigate the settings for 7-day, 30-day, 90-day, or custom options. Return to the main screen. The final selection is your device settings. Adjust the current humidifier setting from off to 5. The new auto humidifier feature is a plus. Currently, the heated tubing is unconnected. Go through the rest of the menu, then connect the heated tubing to see the update. The next option is ramp time. Increase or decrease it to control the time it takes to reach therapy pressure. The new model has an auto ramp feature, which can be turned off for faster pressure buildup.
Track your breathing patterns as you fall asleep. The machine will automatically switch to therapy mode. Select your tube type: 22mm, 15mm slim, or heated tube (once plugged in, it updates automatically). Accessory reminders include filters, tubing, and masks. Set reminders for changing them, or leave them off. Other options include screen and display settings and screen savers.
Customize settings to your preference. There’s a Wi-Fi selection, but this is a cell modem unit, so the Wi-Fi setup is unavailable. Set time, date format, and display details. Plugging in the heated tube updates the middle selection from “unconnected heated tubing” to “auto.” The humidifier is set to auto, but you can change it to manual with 5 setting options. Recommend starting with both the humidifier and heated tube set to auto.
Set the heated tube and ramp time to auto for best results. The machine has a built-in hydrometer and thermometer to constantly measure room conditions, so it adjusts settings better than manual adjustments. If you increase the humidifier setting, you may need to increase the tube set. An excellent upgrade of this device is it displays the clinical neighborhoods on the front panel.
The auto setting on this unit has a minimum of 7 and a maximum of 13, and the Reslex is currently turned off. This is an excellent feature as it helps patients keep track of their settings. We are using the Viva masks on a 3B machine in this demo. The Auto On feature is already turned on and is very sensitive, so it starts before the mask is fully fitted. The front-facing screen on the camera is a new feature that allows users to see how they look while using the machine. The machine operates quietly, with just the sound of breathing audible. It has a similar setup to the old AirSense 10 and is a well-designed unit. So far, there has been no negative feedback, and if it has the same durability as the Luna 2, it will be a good unit for the long term.
Related Posts
AirSense 11 Maintenance Instructional – Quick Overview
Hey everyone, it's Bo. Today, I'm talking about maintaining the ResMed AirSense 11 CPAP machine. It's a simple process, so this won't be a lengthy video. If you find this information helpful, please give us a thumbs up. If you want more information, consider subscribing. If you have any comments, questions, or suggestions, feel free
Crash Course: CPAP vs BIPAP – How It Works
We will cover CPAP and BiPAP, two non-invasive ventilation methods that have become increasingly important in clinical practice, especially given the current situation. This post is designed to provide a comprehensive overview of these methods and help understand how they treat respiratory failure. Given the current situation and recent events, I have received many questions
Twelve Reasons to Start Using a CPAP Machine
Why do we need to use the CPAP machine? Getting used to ventilator therapy isn't easy for most people who suffer from sleep apnea. However, it's better for your health in the long run. Here are twelve reasons to start using a CPAP machine every night. Better sleep: Once you get used to it, you'll
Notice: Internet users spontaneously contributed the article content, and the article views only represent the author himself. This site only provides storage services, does not have ownership, and bears relevant legal liabilities. If you find plagiarism, infringement, or illegal content, please contact the administrator to delete it.