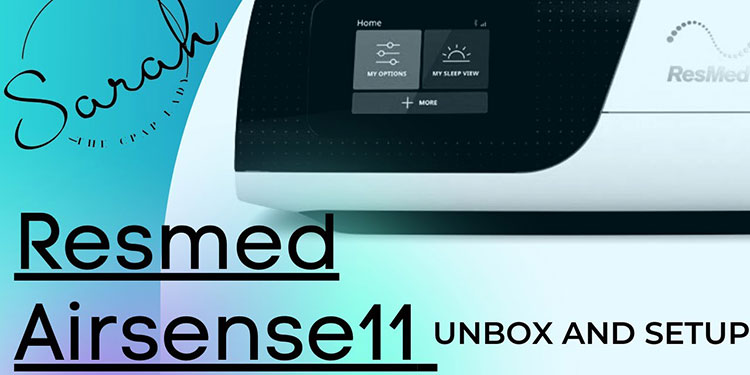
AirSense 11 CPAP – Unpacking and Setup
Welcome to cpapmasktypes.com. I'm Bo. Today, I'll show you the quick and easy process of unpacking and setting up your AirSense 11 CPAP machine. In this video, I'll show you what's included in the package and guide you through the assembly process. For more detailed information, check out the link to our AirSense tutorial series
Welcome to cpapmasktypes.com. I’m Bo. Today, I’ll show you the quick and easy process of unpacking and setting up your AirSense 11 CPAP machine. In this video, I’ll show you what’s included in the package and guide you through the assembly process. For more detailed information, check out the link to our AirSense tutorial series in the description below. If you find this helpful, please consider giving it a thumbs up and subscribing for more. And if you have any questions or suggestions, leave a comment, and I’ll respond promptly. Let’s get started.

When you receive your AirSense 11 CPAP, it comes with a convenient travel case. Upon opening the case, you’ll find a ResMed welcome guide that walks you through the app integration and setup process. The app is user-friendly and makes it easy to get started, but this video will also be helpful for those who prefer a non-tech solution. Inside the case, you’ll find your AirSense 11 CPAP, a water chamber, and a power cord, all conveniently located for you.
In the package, you’ll also receive a converter brick and an AC power cord for use in the US. If you’re in another country, you’ll receive a different power cord that matches your voltage requirements. You’ll also see a climate line tube (the heated version) along with the standard box. And don’t forget to check the manual for detailed instructions. A digital version is available in the description link below. Once you’ve unpacked everything, it’s time to set up your AirSense 11 CPAP. The first step is to find the ideal location for it.
Place the device on a level and stable surface like a nightstand. This ensures the tubing can move freely as it’s six feet long. Connect the power cord to the power brick by plugging it into the back (look for the yellow port).
Connect the cord to the yellow port on the back of the device. It will only fit in one way. If it doesn’t go in quickly, don’t force it. Rotate it and insert it smoothly. Next, connect the AC power to the back of the power brick using the figure eight connection.
Once the device is powered on and working, connect the tubing. If you have a climate tube, look for the electrode on end. And match it with the electrode on the back of the machine at the top of the air outlet. Slide the electrode in carefully. If it doesn’t fit easily, don’t force it. To remove the tubing, grab the sides and pull it out.
To avoid damaging the tube, do not pull from the box itself. Instead, grab it by the cuffs and slide it out. If you have a standard tube, it will be slim with rubber ends, and both ends are the same. Slip it onto the air outlet, and it may need a slight wiggle to get it into place.
Attach the other end of the tubing to the mask. After setting up the machine, fill the humidifier chamber with distilled water to the max line and clip it shut. Place it on a level and stable surface, then slide it into the machine. Finally, connect the mask to the other end of the tubing, whether it’s a heated tube or a standard one.
This slim standard suit tube features a 22mm rubber connection point. For demonstration purposes, I have used the ResMed Airfit P10. If it doesn’t fit easily, I will include another video in the description to help troubleshoot this issue. This is common when switching to a new CPAP, as old connectors may remain on the ancient mask. As for the operation, put on your mask, and you’re ready to go.
This is the P10 nasal pillow mask, which is a popular option. Turn on your device to use it. You won’t even know it’s on as it runs smoothly.
Related Posts
Upgrading Sleep Report on AirSense 11 Tutorial
Hello, it's Bo. Today, I'll explain the Sleep Report on your AirSense 11 CPAP screen. For many users, it will show simplified usage information. However, there is a way to see more detailed information, such as AHI, central apnea, etc. To access this information, you will need to change from the simple menu to the
CPAP Machines: Can I Use a CPAP Machine for Nasal Congestion
Many patients with rhinitis or nasal congestion often breathe with an open mouth at night, so they may feel that using the ventilator does not have a therapeutic effect. Still, instead, they get up in the morning with a dry mouth. This phenomenon will likely result from not communicating with the engineer and using a
Philips Respironics CPAP Mask Review 2025
Philips Respironics CPAP Mask Review 2025: We review this versatile Philips Respironics mask line, with a focus on the nasal cushion model's unique design.
Notice: Internet users spontaneously contributed the article content, and the article views only represent the author himself. This site only provides storage services, does not have ownership, and bears relevant legal liabilities. If you find plagiarism, infringement, or illegal content, please contact the administrator to delete it.