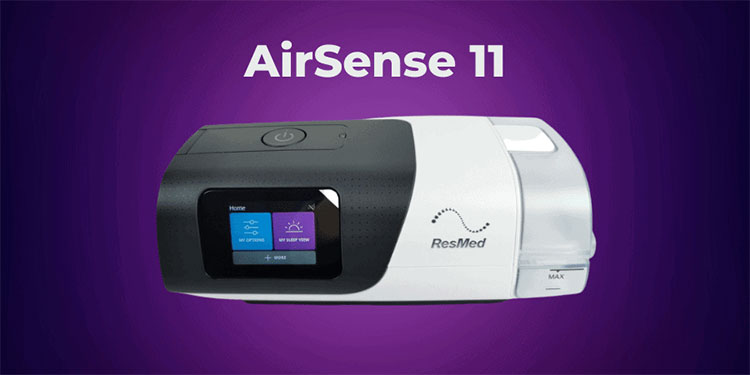
AirSense 11 Maintenance Instructional – Quick Overview
Hey everyone, it's Bo. Today, I'm talking about maintaining the ResMed AirSense 11 CPAP machine. It's a simple process, so this won't be a lengthy video. If you find this information helpful, please give us a thumbs up. If you want more information, consider subscribing. If you have any comments, questions, or suggestions, feel free
Hey everyone, it’s Bo. Today, I’m talking about maintaining the ResMed AirSense 11 CPAP machine. It’s a simple process, so this won’t be a lengthy video. If you find this information helpful, please give us a thumbs up. If you want more information, consider subscribing. If you have any comments, questions, or suggestions, feel free to leave them in the comments section below. Additionally, you can check out our blog for step-by-step maintenance procedures. The link is provided in the description below.
Now, let’s get started. There are three main components of the machine that require maintenance. For this discussion, we will exclude the mask as some masks have different maintenance requirements.

The three components that need to be maintained are the water chamber, filter, and tube. Let’s start with the water chamber, which I consider the most important. It slides in and out quickly and opens like a Gator’s mouth. It’s a simple task as long as it’s done regularly. You should empty it every morning and refill it with fresh, clean water at night. Then, let it air dry throughout the day. Once a week, clean it using a mild dishwashing liquid diluted in water, then rinse it well and let it air dry. If you notice any mineral buildup, you can use vinegar and water to break it down. If you’re using distilled water, this should not be a problem.
The air outlet seal is a critical part of maintenance that was omitted earlier. This should also be cleaned once a week, along with the tubing. To remove it, push the tab and pull the outlet out using the thumb hole on the back. Clean the inside and outside using soap and water, and dry it thoroughly. This area can accumulate humidity and dirt, especially the flap, so it’s essential to keep it clean.
This particular model can only be inserted correctly, so if you have trouble getting it lined up, it means you have it upside down. The tab should be facing downwards when inserting it back in.
The other component to maintain is the filter. On the back of the machine is a door that opens with a tab on the top. To open it, gently pull down on the bill, as it’s easy to snap the door off if you apply too much force. The door doesn’t open all the way. It stays at a 90-degree angle, exposing the disposable filter inside. The filter should be inspected weekly and replaced at least once a month.
Most people recommend replacing the filter of your breathing machine every 2-4 weeks. However, if you notice any discoloration, it’s crucial to replace it immediately, as the filter acts as a barrier to the air you breathe. If the filter is obstructed, it can negatively affect therapy and put extra strain on the motor, reducing the machine’s lifespan. It’s also important to regularly check the hose attached to the device. For demonstration purposes, I am using a climbing line. The climate line is attached to the back of the machine, where small electrodes are visible.
To remove the hose from the machine, line it up with the top and snap it into place. Pinch the sides and pull it out. If you have a standard tube, it should slip off without the electrodes. You may need to wiggle it back and forth to remove it. Regardless of the type of hose, it must be cleaned regularly. Wash it in warm soapy water, not hot water, and do not put it in a dishwasher. Submerge the hose in warm soapy water, swirl it around, and you can use a tube brush to clean it. A picture of a toothbrush and a link to purchase one will be provided in the description below.
When cleaning the hose, it’s helpful to use a tube brush, similar to a pipe cleaner, to get it clean. The most important part of cleaning the hose is to rinse it thoroughly and dry it completely. The electrodes need to be completely dry before reattaching to the machine. If the inside of the tubing is still wet, it can cause problems such as popping or crackling noises when the device is turned on. This could indicate that the tube was not dried enough. To ensure thorough drying, you can hang the hose over a door to allow it to air dry.
To further assist with drying the hose, you can hang it in a place with better air circulation. You can also use a tool to blow air through the hose. Some people even put a napkin at the end of the tube for some restriction. And turn on the machine to let it dry. It is essential to clean the hose, filter, and electrodes once a week and inspect the filter.
Related Posts
CPAP Machine Problems You Have to Know
We all understand that non-invasive CPAP machines can safely and effectively relieve sleep apnea. Still, we always feel a little uncomfortable wearing a CPAP machine to sleep at night. We collect some of the most common problems encountered by CPAP machine customers. This article tells you how to solve these problems so you can get
Twelve Reasons to Start Using a CPAP Machine
Why do we need to use the CPAP machine? Getting used to ventilator therapy isn't easy for most people who suffer from sleep apnea. However, it's better for your health in the long run. Here are twelve reasons to start using a CPAP machine every night. Better sleep: Once you get used to it, you'll
CPAP Machines: Tips For Avoiding 10 Common Problems
CPAP is an important treatment for obstructive sleep apnea, but it may be frustrating at first. Learn how to avoid uncomfortable masks and other common CPAP problems.
Notice: Internet users spontaneously contributed the article content, and the article views only represent the author himself. This site only provides storage services, does not have ownership, and bears relevant legal liabilities. If you find plagiarism, infringement, or illegal content, please contact the administrator to delete it.