ResMed AirSense 10 CPAP CPAP Instruction Guide
Today we'll go over your ResMed AirSense 10 CPAP unit. On the side, there is a door that opens and holds your SD card. The card should always stay in the unit. It will remove by your physician during follow-up appointments to review the data. Behind the card door, another door opens to the air
Today we’ll go over your ResMed AirSense 10 CPAP unit. On the side, there is a door that opens and holds your SD card. The card should always stay in the unit. It will remove by your physician during follow-up appointments to review the data. Behind the card door, another door opens to the air intake filter, which should be cleaned weekly and replaced every 3-6 months. The power supply cord has a foreign plug and should keep from the unit on the floor. The back of the team is where the tubing, known as the Climate Line, with a heated wire, will be connected. The Climate Line helps maintain a consistent temperature.

The ResMed AirSense 10 CPAP unit has a Climate Line that helps regulate temperature during use. It has two ends, one with a rubber piece for your mask and the other with a connector that fits in the back of the unit. To attach, slide it in, and it will snap into place with the ability to swivel. To remove, pinch and pull. The tubing should be removed and washed once a week with mild dish soap and water, then rinsed and hung on a towel rod to dry. The unit also includes a heated humidifier with a plastic water chamber that can be pulled out and filled with distilled water up to the max line but not exceeding it. The water chamber should be washed once a week with mild dish soap and water, then rinsed and dried.
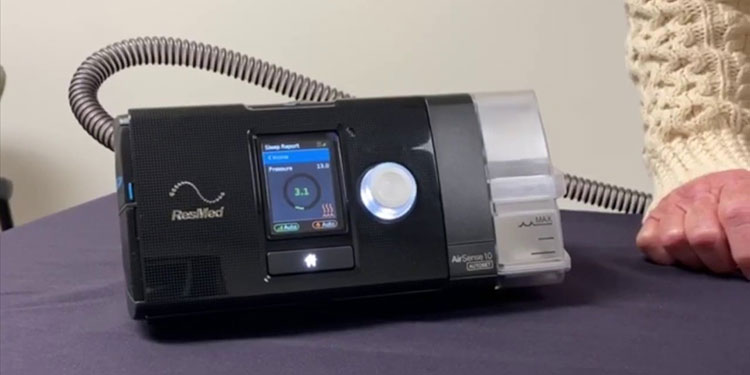
To dry the water chamber, slide it back into the unit and ensure it snaps into place. The ResMed AirSense 10 CPAP unit is turned on by the start and stop buttons located on the top. Pressing start will turn the unit on, and you’ll see a symbol indicating that the heated humidifier is warming. A wireless character also shows the wireless connection has been established. The pressure, which has been prescribed by your physician and preset by your respiratory therapist, is displayed below. The unit’s screen and settings will become active after 10 seconds.
The ResMed AirSense 10 CPAP unit has a start and stops button on the top that goes dark to minimize light during use. If you need to check the screen, press the dial or turn it to light it up. The machine’s pressure range is 4-20, starting at the lowest pressure of 4, with a ramping feature that allows it to gradually increase your bottom stress. The ‘Auto’ symbol with a triangle indicates that the ramping feature is enabled. In the other corner is a symbol showing the wireless connection status.
The symbol on the machine indicates if the heated humidifier is turned on. To turn off the device, press the stop button. A blue snowflake flashing on the screen shows the machine is cooling down, and there will be a light airflow for about 20 minutes. The device will also display the hours used during the last session. If you see a green smiley face, it means you had a good mask fit all night, while a red frown face means your mask was leaking and needs tightening. If the red frown face is recurring, consider contacting your respiratory therapist to see if a different cover would be more suitable. The humidifier will show a green smiley face if it is functioning correctly.
You should call your therapist for assistance to fix a red frown face. By pressing the home button, you will return to the home screen. To access the Sleep Report, select the option that is highlighted in blue and press the dial. The “My Options” section allows you to make comfort adjustments, such as changing the ramp time for the machine’s gradual pressure increase to your set level. By default, this is automatic, but you can manually adjust it to your desired time by selecting the option and pressing the dial.
We recommend starting the climate control in auto mode for a smooth ramp-up from the lowest setting to your desired pressure. If you prefer, you can turn off the auto feature. In auto mode, the machine will self-adjust to the room temperature. If the air is cool and dry, it will produce more heat and humidity; if it’s warm and humid, it will reduce humidity output. You can press the dial and choose a specific tubing temperature and humidity level if you prefer manual control. However, we suggest leaving it in auto mode for a hassle-free start.
Three types of masks are available: nasal pillows, full-face, and nasal covers. You will meet with a therapist to help you choose and fit the suitable mask. To test the fit, put on your show and look for a green smiley face for a good fit or a red frown face for a poor fit. If needed, make adjustments. To pre-warm, the unit, press the dial to activate the heating element before turning on the machine. In airplane mode, pressing the home screen will return you to the main menu. The therapist will provide you with manuals for further instructions on the ResMed S10 CPAP unit and access to this post online for future reference.
Conclusion
The ResMed AirSense 10 CPAP unit is designed to help you regulate temperature and ensure a consistent, comfortable therapy experience. With its easy-to-use start and stop button, adjustable pressure levels, and wireless connectivity, this machine is a convenient and efficient option for those with sleep apnea. The unit includes a heated humidifier and a choice of three different mask types to fit your needs. The climate line, air intake filter, and water chamber should be cleaned and maintained regularly. Remember to check the Sleep Report, make adjustments using the “My Options” section, and consult your respiratory therapist if you experience any issues. With proper use and care, the ResMed AirSense 10 CPAP unit will provide you with restful and peaceful sleep.
Related Posts
AirSense 11 Maintenance Instructional – Quick Overview
Hey everyone, it's Bo. Today, I'm talking about maintaining the ResMed AirSense 11 CPAP machine. It's a simple process, so this won't be a lengthy video. If you find this information helpful, please give us a thumbs up. If you want more information, consider subscribing. If you have any comments, questions, or suggestions, feel free
CPAP Machines: Tips For Avoiding 10 Common Problems
CPAP is an important treatment for obstructive sleep apnea, but it may be frustrating at first. Learn how to avoid uncomfortable masks and other common CPAP problems.
CPAP Machine Problems You Have to Know
We all understand that non-invasive CPAP machines can safely and effectively relieve sleep apnea. Still, we always feel a little uncomfortable wearing a CPAP machine to sleep at night. We collect some of the most common problems encountered by CPAP machine customers. This article tells you how to solve these problems so you can get
Notice: Internet users spontaneously contributed the article content, and the article views only represent the author himself. This site only provides storage services, does not have ownership, and bears relevant legal liabilities. If you find plagiarism, infringement, or illegal content, please contact the administrator to delete it.